The objective of the project: place a composite terrace on furniture floor
You want to place a composite terrace or a wooden terrace and you are looking for a tutorial or composite terrace installation tips, you are in the right place.
The objective of this article is to present you how I installed my composite terrace and how to build a composite terrace.
Make a composite terrace on furniture floor is not so complex as it and I propose to see it by yourself through this tutorial.
If you are only at the stage of reflection and you are mutating your project, I advise you to read the article on things to know before the installation of a composite terrace.
And if you still hesitate on the choice, wood or composite: Read these 5 good reasons to choose the composite!
So heard, everything is not perfect, and that’s why it’s interesting!
You will be able to enjoy my feedback on the installation of my composite terrace, enjoy the feedback from the laying of a terrace of other readers in the many comments and of course, in your turn, ask The questions in the comments!
As I like to do it in my followers of files, I will talk about the aging of this terrace, first 5 years later!
Before continuing, there are composite terrace kit ranging from 20m2 to 50m2 that can be very interesting!
Laying a composite terrace: the material used
Anthracite composite terraces blades
The blades used are composite terrace blades blooma anthracite 220 x 14.5 cm promotional at 27.90 euros the m² at Castorama:
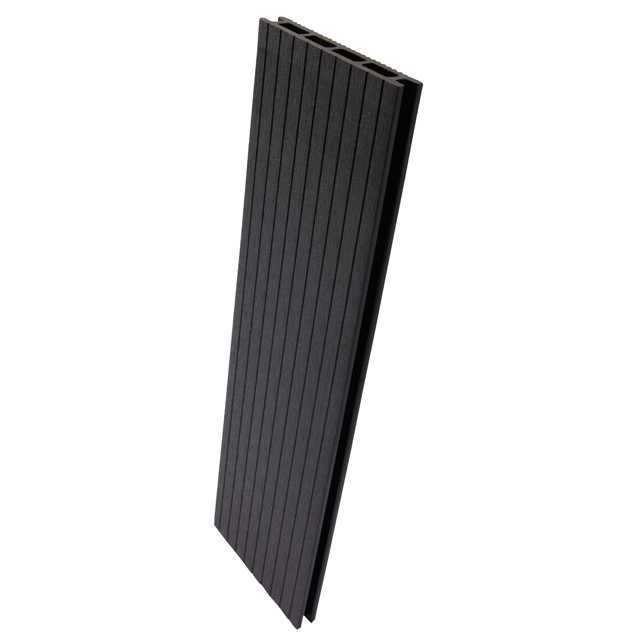
Edit 2020: Blooma blades as I asked them in 2012 no longer exist.
Those who get closeries are the composite blades Anthracite Blooma Oder at 22.98 euros the m²!
or these:
Anthracite composite terrace blade Neva L.220 x L.14.5 cm
Lambourd Fixing Plots
Plots are plastic pads I bought from Bricodepot.
There are concrete pads but that for the shot are not adjustable.
The advantage of concrete pads is that they will not move in time.
Their disadvantage, well they are not adjustable …
These adjustable pads are sold by lot of 10 and cost around 30 euros
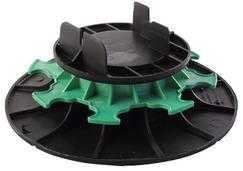
There are also concrete pads, the big advantage of these studs is of course that they are stronger but of course, the big disadvantage is that it is not regulable.
You can find Baton Brico Depot plot at discount prices.
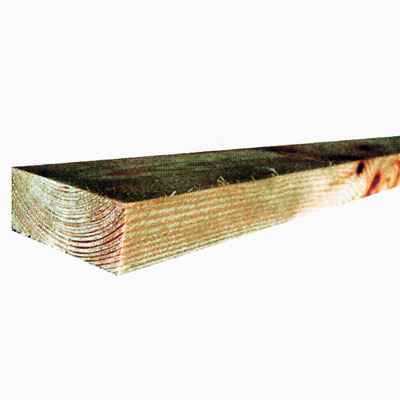
Lambourds
Lambourdes are Casto’s first prize lamps.
They are in class IV autoclave pine and not 3 as shown on the site.
You can also opt for Class 4 Brico Depot Lamb, they will perfectly make the case even if they are cheaper.
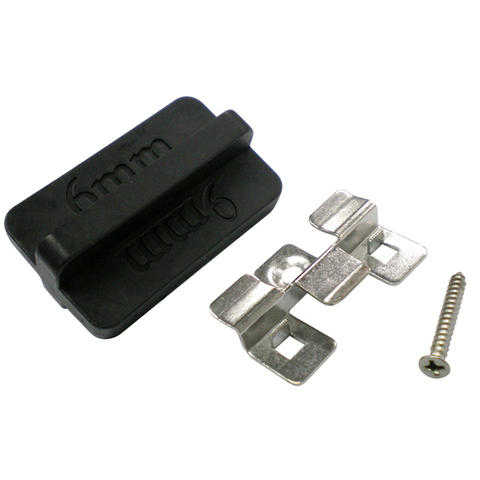
Blades Fixing Clips
The fixing clips make it possible to assemble the composite blades between it by fixing them on the lamps so that the blades are not pierced.
The fixation is discretion without being invisible!
The geotextile film under the pads to avoid pushing grass
In order to avoid pushing grass or other under your terrace, you have to put a geotextile movie under your terrace.

You will also need a screwdriver, a level, a mallet and elbow oil, a lot of elbow oil
Put your composite terrace yourself: the complete tutorial
So here is, the idea is to put a composite blade terrace on Lambs and pads on a raw ground (without sole).
It is also said that a soil without concrete slab is a furniture ground.
Why?
Ben to put a garden furniture on to take the aperitif of course !!!
The terrace will encompass the bay window and the window door below, ie 4 meters 40 over 3 meters 60.
Which gives us an area of terrace of 15.84 m²!
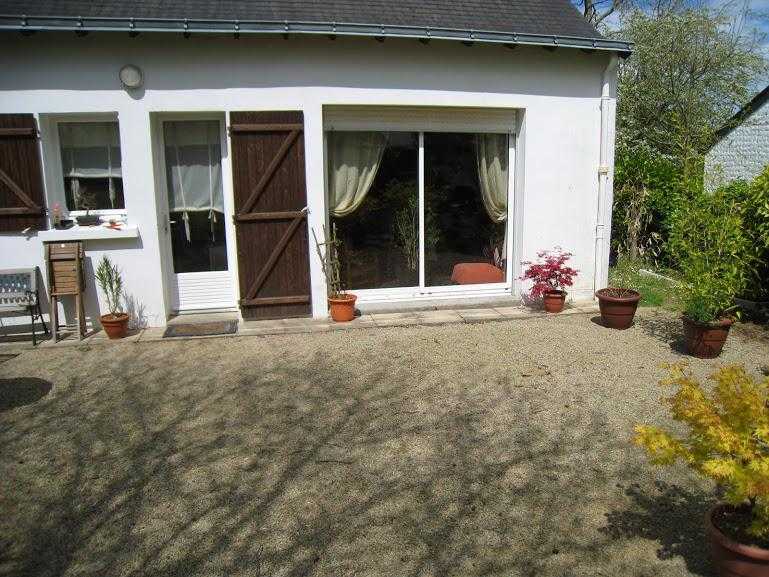
Floor preparation for laying the terrace
The first step is to remove gravel and disburse the plus as much as possible to avoid gallery then to have a terrace about a level.
even if the adjustable pads allow to erase the imperfections of the ground.

By luck, I did not have a lot of work to do, the old owners had already flattened the ground for their own terrace
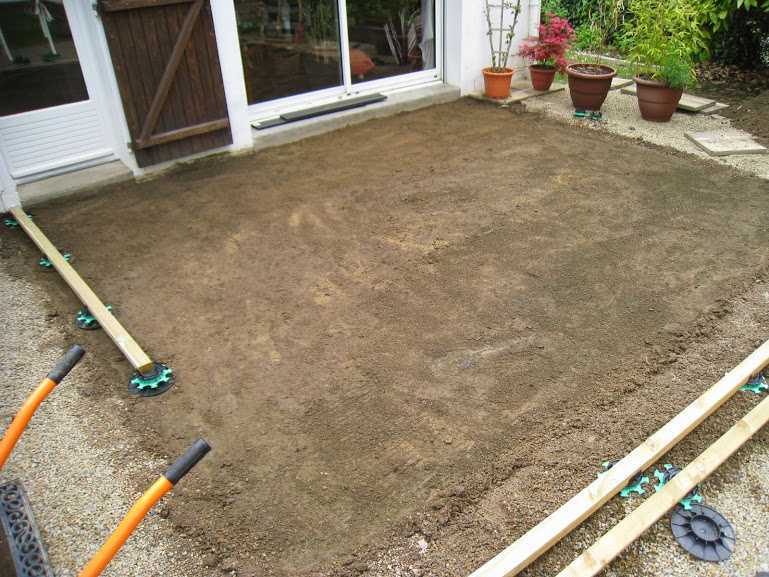
Once the ground is prepared, you can already prepare your lamps. I chose to use Class 4 autoclave pine lamps.
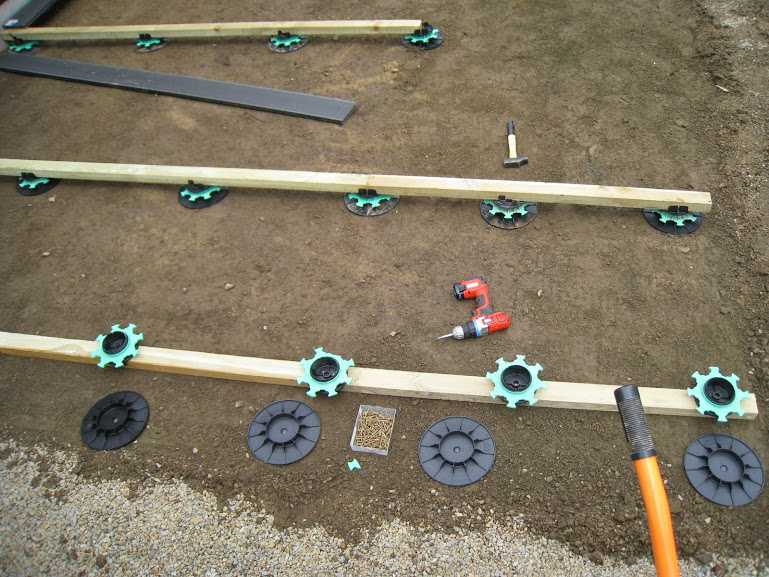
Preparation of Lambourdes – Screwing Plots on Lambourdes
Note that composite lamps can only be used on a concrete floor or a chappe.
Finally that’s what the seller Casto told me who advised me.
I decided to screw directly the pads on the lamps so that they do not move when put.
Nobody advised me to do that like that but I thought it was a good idea to see.

Once positioned the pad brackets, you can place the Lamb to its final location.
Laying geotextile movie
The setting up of a geotextile film is not mandatory but strongly recommended.
In addition it’s not what brings the most budget!
So I advise you not to impleat on this post, unless of course you want a baobab forest invests your terrace.

Laying lamps
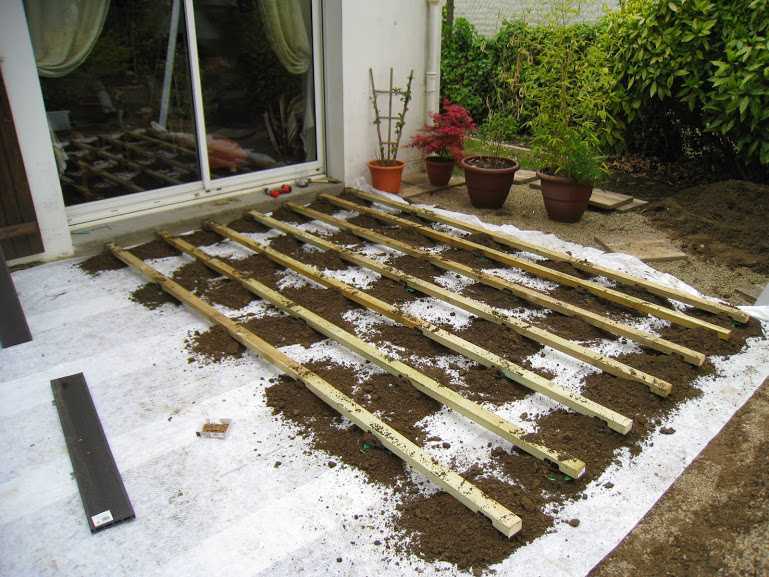
It’s time to put the lamps, 30 cm from each other.
Indeed, it is advisable not to fall below 30 cm of spacing between your lamps so as not to meet you with hollows of blades between the lamps.
Everything will also depend on the quality of the blades you have bought but even for beautiful, well-solid blades, it will not be expected to space your lamps. (see the spacing between Lamb Composite Terrace)
The anthracite color being upper heat, it can move with the temperature and it is imperative to respect this distance from 20cm lamps.
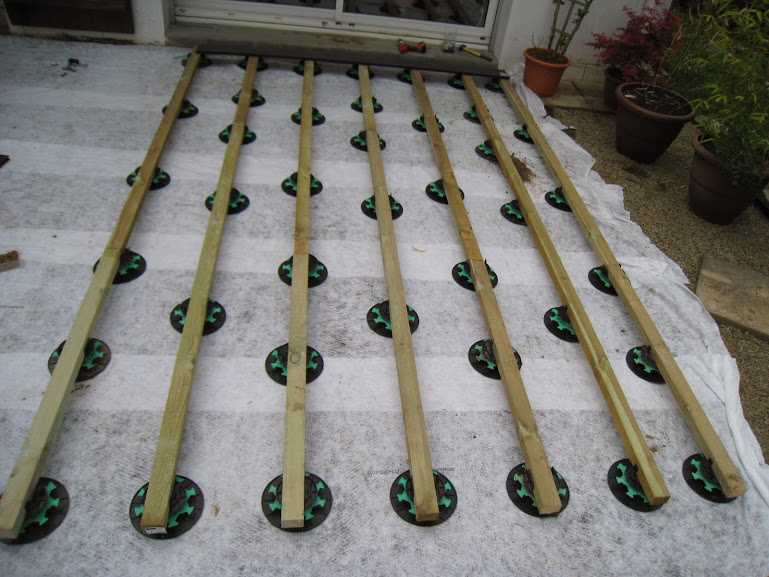
It’s time now to put on earth or sand on the pads so that it does not move too much.
Save of course the sand for not only weeds grow (wind seeds or birds) by the interstices left by the terrace blades.
So it looks like the earth but in the country Nantes, the earth looks more like sand than to the true earth!
Laying of composite blades
The blades will be placed on the lamps as follows:
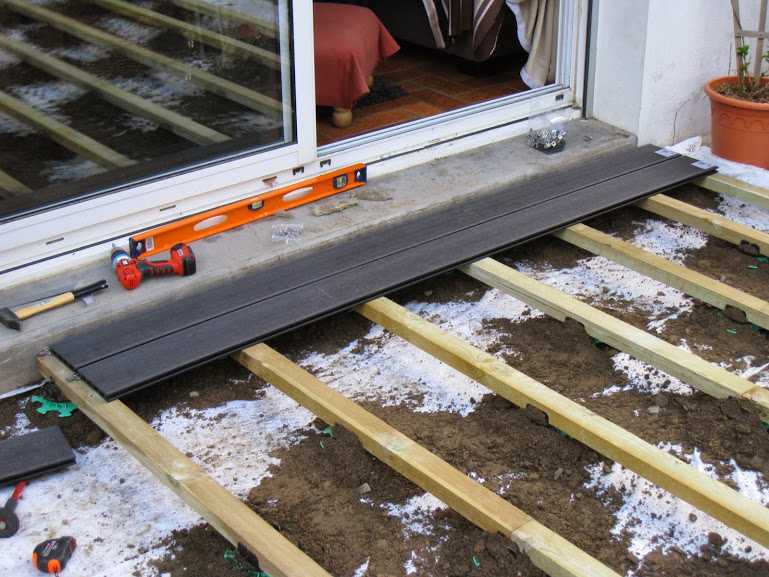
I’ll talk about you a little later but I should have interpreted my blades in the parquet floor.
Again, often we think about saving on the pose and with the recoil we say that for a few tens of euros, we could have made a lot more pretty and aesthetic rendering.
Composite blade clipping on the lamps
The blades being spaced 5 mm provided by the fixing clips:

This spacing between the blades thus ensure the space of expansion of the blades (especially in case of very strong heat).
Moreover, this allows an aesthetic pose of the blades of the terrace.
The rest of the installation of the composite terrace does not present any major difficulties.
I let you discover the rest in the image of the installation composite terrace:
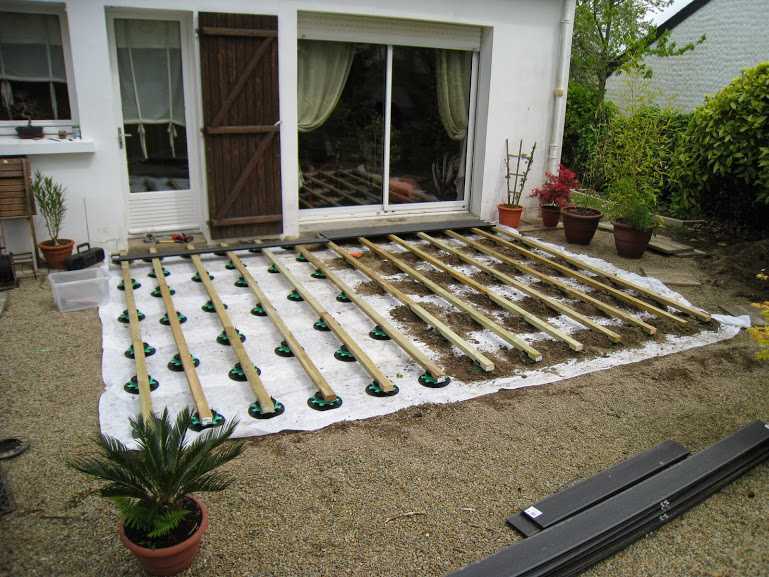
Just repeat the same laying gestures as long as there is room for the blades!

Do not forget to control the slopes using a level and if necessary, adjust the studs.
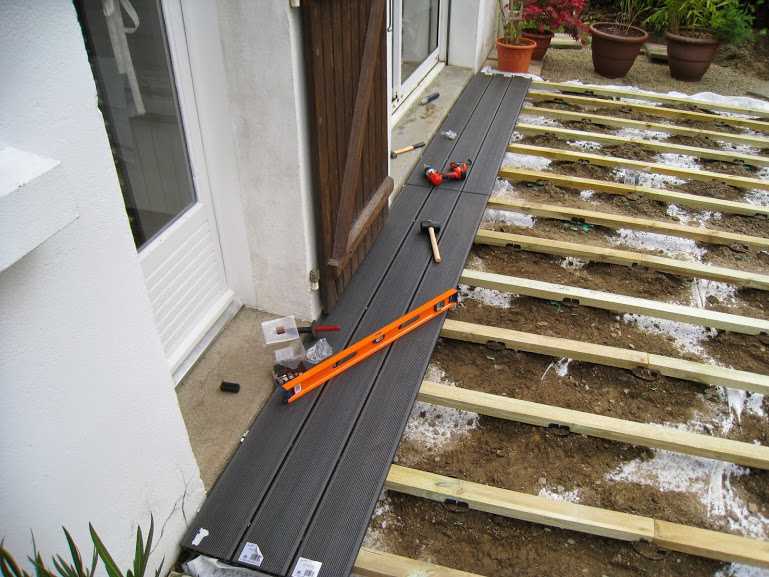
It starts to take shape is not it!?
We start to imagine the apero on this beautiful terrace not?

Well, we are coming soon at the end of the lamps:
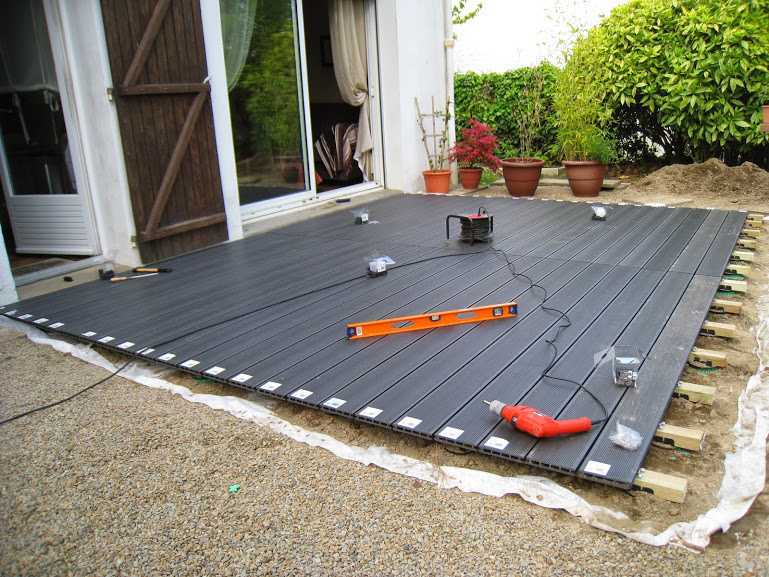
The last blades on the terrace will clip on an edge and screwed directly into the lamps on the other edge.
Indeed, we will not put clips on the edge of the terrace.
Moreover, in this regard, it would be to redo, I would not put clips at the beginning but I will screw them directly as in the end.
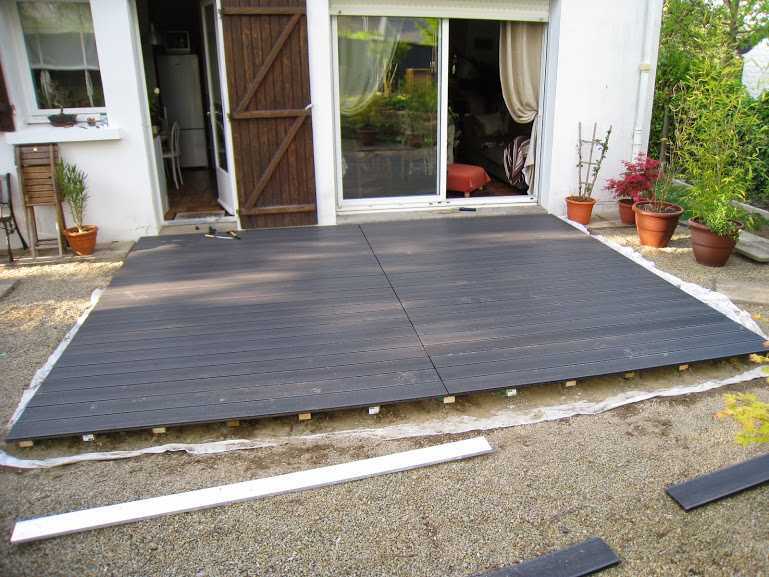
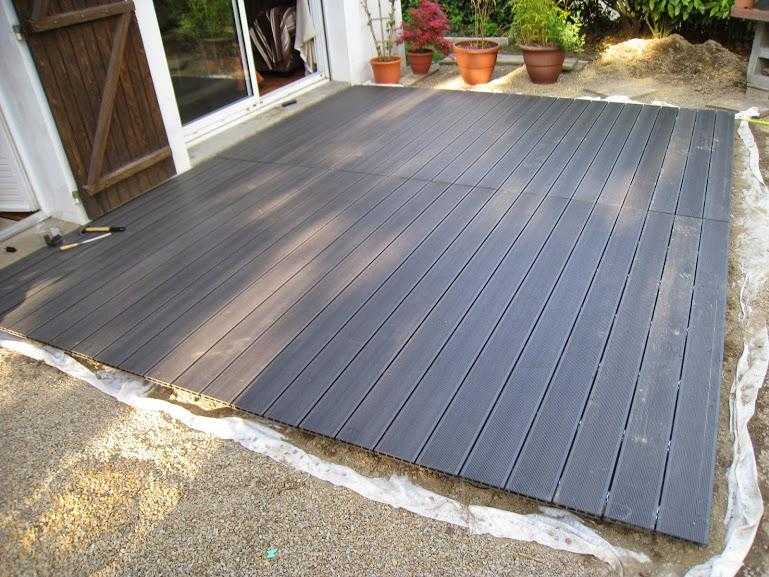
The composite terrace finally asked
Ee Voilà, was fine you are! Tada !!

And now, only remains the finish and laying a arbor but that, it’s in a future article!
Errors made when laying my composite terrace
You have seen it in the tutorial, I made several mistakes when my pose!
You will enjoy my feedback on the installation of my composite terrace, and I hope that this will serve you!
It’s too late today to catch up but it’s not for you!
– Do not alternate terrace blades like parquet
By the worries of economy (both in price and cutting), I made the decision not to alternate the blades and I regret it today.
On the one hand because it would have been more beautiful and then I could have avoided a phenomenon of “gondolage” blades in the middle (central lambs).
– Do not pass the electricity under the terrace
Well, I told you above, but think there, pass pipes, even if you do not go from cable from the beginning, at least you will have them in case!
– Take blades too average range
I did not take the cheapest blades, I took the blades from Casto mid-range.
To redo, I should have put a little more expensive but take the range above.
Even if I am satisfied with the quality of Blooma blades from Casto, I think there is better!
These blades still stay a good value for money!
The finishes of the composite terrace
Rather than weighing this article already dense, I propose a new article detailing the finishes of the composite terraces.
Example of the finishes of the Magali terrace:
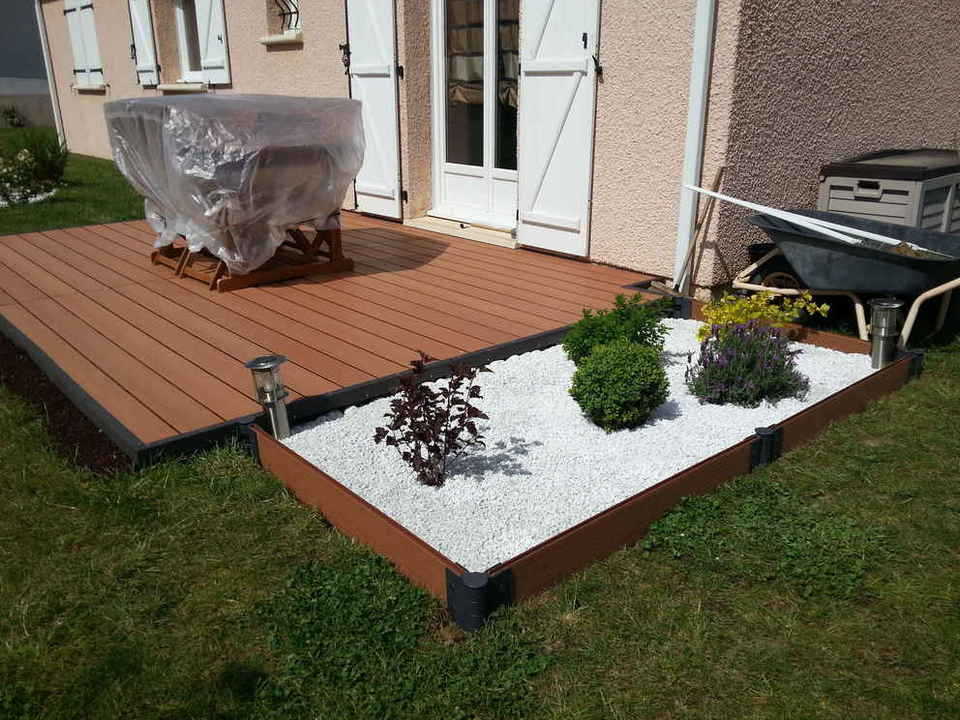
Discover the article on how to choose its composite terrace finishes
Aging in the time of a composite terrace
I propose to see what gives time on a composite wooden terrace.
Does this terrace have moved, is it trying …?
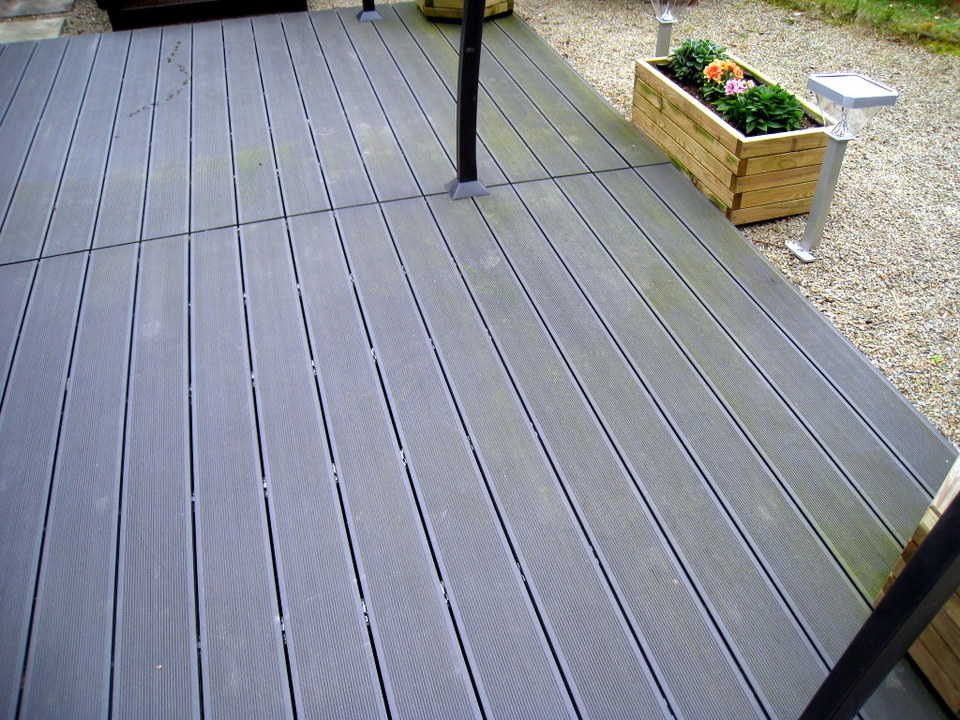
A year later, I let you discover how this composite terrace has agitated!
Edit of April 10, 2017: 5 years later, I come to give you news of this terrace!
Edit of July 7, 2019: This terrace has a small wooden sister:

Find the article about the application of the saturator on this wooden terrace.
Conclusion
As you can see in this tutorial, the installation of a composite terrace is not easy but is not an insurmountable thing.
You have to be careful to respect some basics but these basics are easily understood by a handyman of the brave Sunday!
For yes, you will need a little courage, light bulbs will surely come to light at night but frankly, it’s worth it well no!?
So when will you get started?
Do not hesitate to comment or ask questions!
